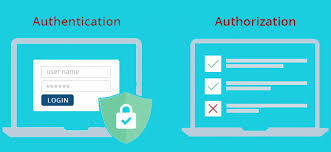
React : Implementing Token-Based Authentication and Authorization with functional components

Token-based authentication is a popular approach for securing web applications, where users are issued tokens upon successful login, which are then used to access protected resources. In this blog post, we'll explore how to implement token-based authentication and authorization in a React application, including the use of authorization handlers for protected routes.
Step 1: Set Up the Backend: Begin by setting up a backend server (e.g., Node.js with Express or ASP.NET Core) to handle user authentication and token generation. Define endpoints for user login and token generation.
Step 2: Create React Application: Generate a new React application using Create React App or any other preferred method. This will serve as the frontend for our authentication system.
npx create-react-app my-auth-app
cd my-auth-app
Step 3: Implement Authentication Service: Create an authentication service in React to handle user login and token management. This service will make API calls to the backend for authentication.
// AuthService.js
const login = async (username, password) => {
  const response = await fetch('/api/login', {
    method: 'POST',
    headers: {
      'Content-Type': 'application/json'
    },
    body: JSON.stringify({ username, password })
  });
  const data = await response.json();
  return data.token; // Assuming the backend returns a token upon successful login
};

export default { login };
Step 4: Implement Login Component: Create a login component in React to allow users to log in with their credentials.
// LoginComponent.js
import React, { useState } from 'react';
import authService from './AuthService';

const LoginComponent = () => {
  const [username, setUsername] = useState('');
  const [password, setPassword] = useState('');

  const handleSubmit = async (e) => {
    e.preventDefault();
    const token = await authService.login(username, password);
    console.log('Logged in with token:', token);
    // Redirect user to dashboard or protected route upon successful login
  };

  return (
    <form onSubmit={handleSubmit}>
      <input type="text" placeholder="Username" value={username} onChange={(e) => setUsername(e.target.value)} />
      <input type="password" placeholder="Password" value={password} onChange={(e) => setPassword(e.target.value)} />
      <button type="submit">Login</button>
    </form>
  );
}

export default LoginComponent;
Step 5: Protect Routes with Authorization Handler: Create an authorization handler in React to restrict access to protected routes based on user authentication status and token validity.
// AuthorizationHandler.js
import React, { useEffect, useState } from 'react';
import { Route, Redirect } from 'react-router-dom';
import authService from './AuthService';

const ProtectedRoute = ({ component: Component, ...rest }) => {
  const [authenticated, setAuthenticated] = useState(false);

  useEffect(() => {
    const checkAuthentication = async () => {
      const token = localStorage.getItem('token');
      if (token) {
        // Check token validity with backend
        // For simplicity, we'll assume token is valid
        setAuthenticated(true);
      }
    };
    checkAuthentication();
  }, []);

  return (
    <Route {...rest} render={(props) => (
      authenticated ? (
        <Component {...props} />
      ) : (
        <Redirect to="/login" />
      )
    )} />
  );
}

export default ProtectedRoute;
Step 6: Update App Component and Routing: Update the main App component to include routing and protect routes that require authentication.
// App.js
import React from 'react';
import { BrowserRouter as Router, Switch, Route } from 'react-router-dom';
import LoginComponent from './LoginComponent';
import DashboardComponent from './DashboardComponent'; // Example protected route
import ProtectedRoute from './AuthorizationHandler';

const App = () => {
  return (
    <Router>
      <Switch>
        <Route exact path="/login" component={LoginComponent} />
        <ProtectedRoute exact path="/dashboard" component={DashboardComponent} />
        {/* Add more protected routes as needed */}
      </Switch>
    </Router>
  );
}

export default App;
let's add two more pages as functional components, one of which will be accessible without authentication, and the other will require role-based authorization.
Step 7: Create Additional Pages (Functional Components):
Page 1: Home Page (Accessible without Authentication)
// HomePage.js
import React from 'react';

const HomePage = () => {
  return (
    <div>
      <h1>Welcome to Home Page</h1>
      <p>This is the home page of our application.</p>
    </div>
  );
}

export default HomePage;
Page 2: Admin Dashboard (Requires Role-Based Authorization)
// AdminDashboard.js
import React from 'react';

const AdminDashboard = () => {
  return (
    <div>
      <h1>Admin Dashboard</h1>
      <p>This is the admin dashboard page.</p>
    </div>
  );
}

export default AdminDashboard;
Step 8: Update App Component and Routing:
App.js
import React from 'react';
import { BrowserRouter as Router, Switch, Route } from 'react-router-dom';
import LoginComponent from './LoginComponent';
import HomePage from './HomePage'; // New page
import AdminDashboard from './AdminDashboard'; // New page
import ProtectedRoute from './AuthorizationHandler';

const App = () => {
  return (
    <Router>
      <Switch>
        <Route exact path="/login" component={LoginComponent} />
        <Route exact path="/" component={HomePage} /> {/* Home page accessible without authentication */}
        <ProtectedRoute exact path="/admin" component={AdminDashboard} roles={['admin']} /> {/* Admin dashboard requires role-based authorization */}
        {/* Add more protected routes as needed */}
      </Switch>
    </Router>
  );
}

export default App;
In this setup, the "Home" page is accessible without authentication, while the "Admin Dashboard" requires role-based authorization. The "ProtectedRoute" component checks if the user is authenticated and has the required role to access the protected route. This allows for a flexible and secure navigation experience in your React application.
Conclusion: By following the steps outlined in this blog post, you can implement token-based authentication and authorization in a React application. The authentication service handles user login and token management, while the authorization handler restricts access to protected routes based on user authentication status. With this setup, you can create secure and authenticated user experiences in your React applications.

