C# : Building Serverless Applications with Azure Functions - A Step-by-Step Guide

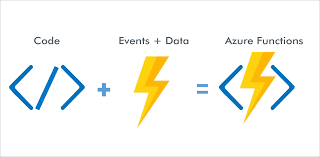
Serverless computing has become a popular paradigm for building scalable and cost-effective applications. Azure Functions, a serverless compute service from Microsoft Azure, enables developers to build and deploy event-driven functions without managing infrastructure.
In this blog post, we will guide you through the process of creating Azure Functions in C# from development to deployment.
Step 1: Install Visual Studio and Azure Development Workload
Ensure you have Visual Studio installed on your machine with the "Azure Development" workload. You can download Visual Studio from here. During installation, make sure to select the "Azure Development" workload.
Step 2: Create a New Azure Functions Project
Open Visual Studio.
Click on "Create a new project."
In the "Create a new project" window, search for "Azure Functions" in the search bar.
Choose the "Azure Functions" template and click "Next."
Enter the project name and location, and click "Create."
Step 3: Add a New Azure Function
Right-click on your project in the Solution Explorer.
Select "Add" -> "New Azure Function..."
Choose the "HTTP trigger" template for simplicity, and click "Create."
Step 4: Write Your Azure Function in C#
Open the generated Function1.cs file (or the file you created) and modify it to suit your needs
using Microsoft.AspNetCore.Mvc;
using Microsoft.Azure.WebJobs;
using Microsoft.Azure.WebJobs.Extensions.Http;
using Microsoft.AspNetCore.Http;
using Microsoft.Extensions.Logging;
using Newtonsoft.Json;
using System.IO;
using System.Threading.Tasks;

public static class MyHttpFunction
{
    [FunctionName("MyHttpFunction")]
    public static async Task<IActionResult> Run(
        [HttpTrigger(AuthorizationLevel.Function, "post", Route = null)] HttpRequest req,
        ILogger log)
    {
        log.LogInformation("C# HTTP trigger function processed a request.");

        string requestBody = await new StreamReader(req.Body).ReadToEndAsync();
        dynamic data = JsonConvert.DeserializeObject(requestBody);

        return new OkObjectResult($"Hello, {data.name}");
    }
}
Step 5: Test Locally
Press F5 to run your function locally.
Your function will be available at http://localhost:7071/api/MyHttpFunction.
Step 6: Deploy to Azure
Right-click on your project in the Solution Explorer.
Select "Publish" -> "Azure Functions..."
Follow the prompts to create a new function app in Azure or choose an existing one.
Click "Publish" to deploy your function to Azure.
Step 7: Monitor and Manage in Azure Portal
Visit the Azure Portal to monitor, manage, and scale your Azure Functions. You can find your deployed function under the "Function Apps" section.
Conclusion
Using Visual Studio streamlines the development and deployment process of Azure Functions, providing a convenient integrated environment for building serverless applications.
Explore additional features such as application settings, configuration, and integration with Azure services to enhance your serverless solutions further.
Happy coding!

